Showing posts with label Cylinder head. Show all posts

1/20/13

Opel Frontera A 2.3 TD - Cylinder Head Disassembly - Part2 (Camshaft removal)


I started to disassemble cylinder head and the first thing i did, I removed the camshaft. So, in this post I'll shortly describe how the job was done.

Opel Frontera 2.3 TD Camshaft removal - bolt tightening sequence


To remove the camshaft from Opel Frontera 2.3 TD cylinder head you need to remove the bolts that are holding the camshaft by it's pedestals on cylinder head and you must follow the same procedure as for cylinder head removal from the engine, which i described in one of previous posts.


On the previous picture you can see the sequence for tightening the bolts that are holding camshaft, so you need to go in reverse order to the shown sequence and be careful like i wrote before. (Each camshaft pedestal has two bolts.)

While removing the camshaft from cylinder head I was very careful not to let the pedestals slide from the camshaft, so when I decide to assemble everything back I will have everything as it was. (Camshaft pedestals can easily slide from the camshaft because everything is oiled up.)

To be sure that pedestals will stay on their positions I wrapped everything with some masking tape and plastic wrap, as shown on the next picture.


Next part of job is to remove the valves from cylinder head, so I will write short description about the work in next post.


You can read about everything that has been done in the following posts: 

Cylinder Head DISASSEMBLY: PART1 , PART2 , PART3

Cylinder Head REMOVAL: PART1 , PART2 , PART3 

1/18/13

Opel Frontera A 2.3 TD - Cylinder Head Disassembly - Part1


As I promised, in previous post about Opel Frontera A 2.3 TD  Bad Head gasket - part3, I will now give short description about the work I did during cylinder head disassembly.


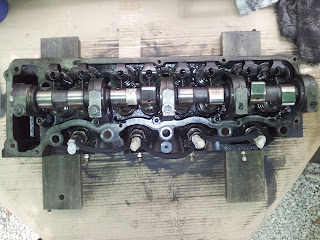
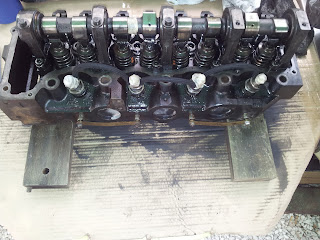
To start the disassembly of the cylinder head you need to prepare your working area and tools that you will need during cylinder head disassembly. As you can see on the next pictures i used one small working table  and two pieces of wooden board on which i placed the cylinder head.

Opel Frontera A 2.3 TD Cylinder Head Disassembly 1/2

Opel Frontera A 2.3 TD Cylinder Head Disassembly 2/2

It is important to use these boards because there must be some empty space below cylinder head so you won't harm the valves that are sticking below cylinder head.

Next part of job is to remove the camshaft, so I will write short description about the work in next post.


You can read about everything that has been done in the following posts: 

Cylinder Head DISASSEMBLY: PART1 , PART2 , PART3

Cylinder Head REMOVAL: PART1 , PART2 , PART3 

1/16/13

OPEL FRONTERA A - BAD HEAD GASKET -part 3 ( Removing cylinder head from engine block)


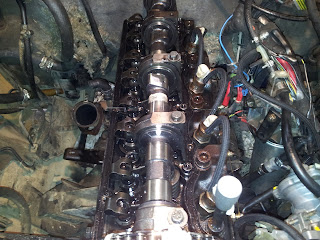
Finally, it was time to prepare cylinder head for removal. First thing I did, i removed cylinder head valve cover by unscrewing 9 bolts. Next two pictures are showing how the cylinder head looks without it's cover.

Removed cylinder head valve cover

Removed cylinder head valve cover on engine


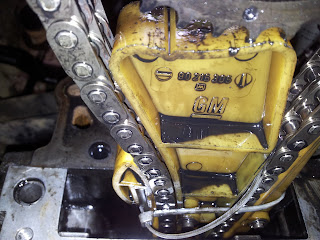
Second thing before cylinder head removal is to unbolt the timing chain sprocket from camshaft. Before that I needed to secure timing chain on it's sprocket so it won't fall down in the engine hole and mess the timing of the camshaft/crankshaft. I used few plastic ties/fasteners to secure them in place. An idea which I used to secure timing chain sprocket, is shown on next pictures.

Securing camshaft timing chain sprocket 1/2

Securing camshaft timing chain sprocket 2/2

Important thing in this part was to remove timing chain tensioner whose bolt is on the side of the cylinder head. To unbolt timing chain sprocket from the camshaft you need to use another wrench (or special tool) to stop camshaft from spinning while unbolting it.

Next step is to disconnect all hoses which connect to the thermostat housing and all other wires and stuff that are connected to the cylinder head.


After everything was done, I unscrewed ten head bolts which are holding cylinder to the engine. It is very important to unscrew them in the spiral order which you must use when removing cylinder head and tightening it back on the engine block. If you follow this you are avoiding possible cylinder head warp and cracks. The schematics or the cylinder head tightening sequence for Frontera 2,3 TD is shown in the next picture. So, to remove cylinder head you need to go in reverse order to the shown sequence.

Cylinder head tightening sequence
Unscrewing the bolts is done progressively, so I needed to do few sequences with slackening them by third of a turn until the head bolts could be unscrewed by a hand. After I removed all head bolts i slightly tapped cylinder head so it could be easily removed. You need some kind of a crane to lift the cylinder head, or an assistant, because you need to lift it straight up so you won't damage the surfaces of cylinder head or engine block and you can take care that the timing chain sprocket stays in it's place. After cylinder head removal it is easy to remove the bad gasket. Next pictures are showing the engine block surface after the cylinder head and gasket have been removed. You can see how bad the failure with head gasket was...  but also the engine itself...  :(


Engine block surface 3/4Engine block surface 1/4Engine block surface 2/4

Engine block surface 4/4


In next post i will show you the part of job where i started to dismantle the cylinder head so I could send it to specialist for further inspection for warp and cracks...  Until then... CHEERS!  :)


You can read about everything that has been done in the following posts: 

Cylinder Head REMOVAL: PART1 , PART2 , PART3 

Cylinder Head DISASSEMBLY: PART1 , PART2 , PART3

10/6/12

OPEL FRONTERA A - BAD HEAD GASKET -part 2 ( Removing lines between injector pump and injectors)


After removing intake and exhaust manifold and turbocharger, I needed to remove lines between the injector pump and the injectors, and after that the filter with its mount.

Removing injector lines


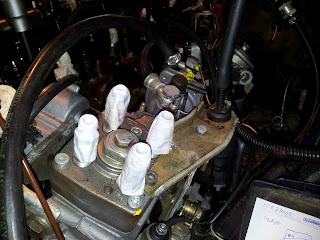
On the picture above, you can see where the removed lines were, which I removed by using wrench because the line connections on the injector pump and injectors are made by nuts.


Disconnecting injection pump
After removing the lines, I protected the injection pump and injectors connections (holes) by using fingertips from rubber gloves. I protected those things because I didn't want anything to go in, like dirt or other unwanted things that could harm injector pump.


Before I could commit myself to work with the cylinder head, final thing that I needed to do, was removing the filter. There were two bolts holding the filter to the head. Next picture shows where those bolts where.

Removing filter mount


You can read about everything that has been done in the following posts: 

Cylinder Head REMOVAL: PART1 , PART2 , PART3 

Cylinder Head DISASSEMBLY: PART1 , PART2 , PART3

9/13/12

OPEL FRONTERA A - BAD HEAD GASKET part 1


During one longer trip with my car i found out that it overheats a lot and looses coolant. I went to my mechanic and he did some test for head gasket failure.

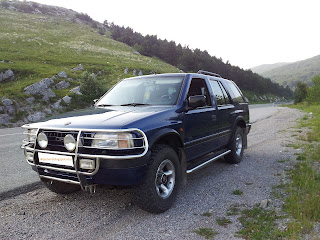
Opel Frontera 2.3 TD

Head gasket was bad, so i decided to change it by myself to save some money. While i was doing that i took some photos.


I started to dismantle parts that must be removed so i could remove cylinder head. In next few pictures you can see how it looks when they are remove.

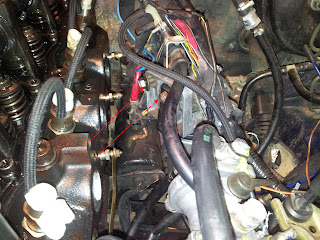
First I needed to remove inlet manifold which was mounted over exhaust manifold. After I did that i removed exhaust manifold which comes out connected to turbocharger, so I needed to unbolt one bolt which was connecting turbocharger to it's mounting on engine block, and three bolts which connect turbocharger and down pipe to the exhaust pipe. To unbolt those bolts I needed to go under the car. Here are the photos how the engine looks after i removed manifolds and turbocharger.


You can see how Frontera's engine looks without intake and exhaust manifold and turbocharger. (The valve cover is also removed)


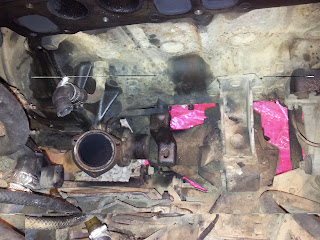
Next photo shows turbocharger's down pipe connection spot to exhaust pipe.

Turbocharger's down pipe connection spot to exaust pipe


You can read about everything that has been done in the following posts: 
Cylinder Head REMOVAL: PART1 , PART2 , PART3 

Cylinder Head DISASSEMBLY: PART1 , PART2 , PART3
Template developed by Confluent Forms LLC